Using Angular Elements in ASP.NET Core 5
THE DEFINITE GUIDE
Using Angular Elements in ASP.NET Core 5
Angular, Google’s TypeScript based web application framework is currently at version 11, but I would like to talk about a very powerful and sadly neglected feature of Angular that was added to it back in version 6. That feature is Angular Elements.

This year I was tasked to incorporate several Angular components into an existing ASP.NET Core application. There was already a messy solution implemented, involving an enormous script which loaded a classic Angular app with all the components, regardless of their relevance to the current page, which, obviously, was not efficient in terms of speed and size.
Also, this approach was a hell in terms of software development process, which required me to run a Gulp script, rebuild the ASP.NET app and hard reload the page every time I changed a tiny bit of CSS. The team was not happy with neither the app performance, nor the development process, so my objective was to:
- Create a new solution, which will allow to incorporate a single Angular component inside a page, rather than the whole application.
- Would work faster and not load huge, unnecessary scripts.
- Would allow for faster dev build times with no need of constant script rerun.
So, naturally, I turned to Web Components.
What are Web Components?
Web Components are the concept of components from frameworks like React or Angular, but built for the web overall in a framework-agnostic way. What does that mean?
We are used to our simple HTML tags in our UI. For example, we know tags like div, span, and others. They have predefined behavior, and may be used in different places of our view.
Web Components essentially allow us to create new HTML tags/elements using JavaScript. Let’s see a small example of how this is done, purely with JavaScript.
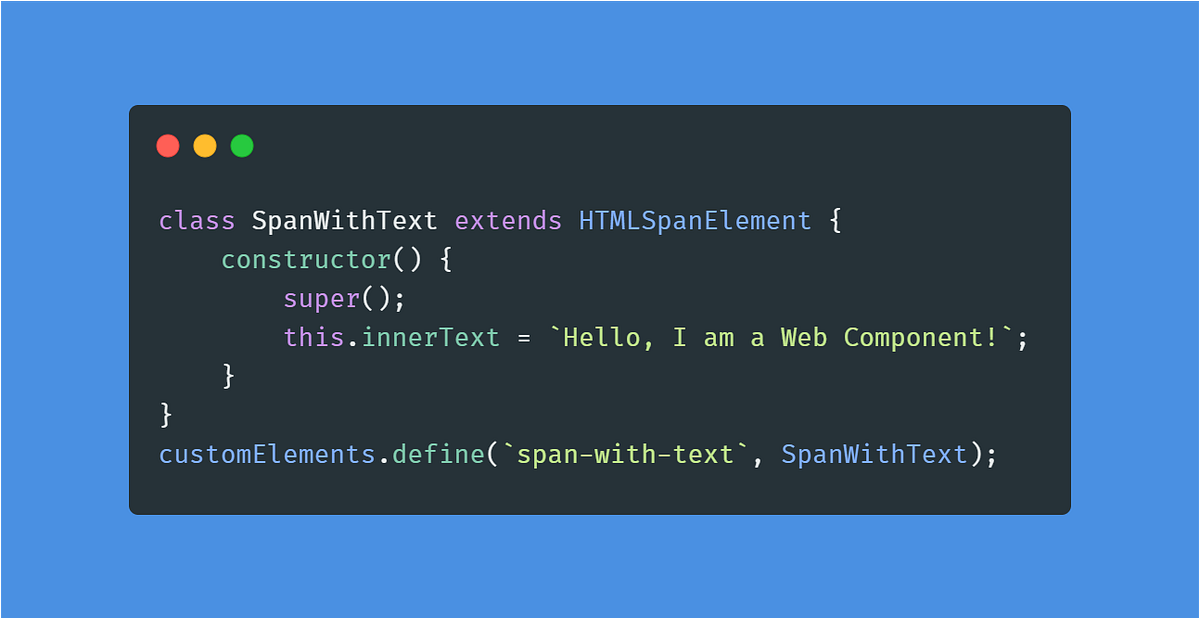
Here we create a class which extends from HTMLElement (HTMLSpanElement in our case, to be more precise), and whenever this element is created, it will have a innerText with value Hello, I am a Web Component. So, whenever we use our element in the DOM, it will already have the populated text inside itself. We then register our new element with a custom tag and we are ready to use it:

Of course, it would be great to be able to turn our Angular Components into Web Components and use them wherever we want, no matter the environment. And turns out, with the use of Angular Elements, we can do precisely that.
Getting Started
Let’s start by creating a new ASP.NET Core 5 web application. For this, make sure that you have the latest version of .NET 5 SDK installed.
Open your favorite terminal, and enter the following command:
$ dotnet new webapp -o aspnetwebapp
You can then run the app:
$ cd aspnetwebapp
$ dotnet watch run
Then, let’s continue by creating a new Angular project inside our ASP.NET project. For this, make sure that you have the latest version of Angular CLI installed. Run the following command in your terminal:
$ npm install -g @angular/cli
Once this install is complete, we can use it to create a new initial application in our system like this:
$ ng new AngularApp
Angular CLI will ask you a couple of questions for configuring your project. Answer ‘yes’ to enforcing strict mode (helps writing better TypeScript and minimizing bundles sizes) and ‘no’ to adding Angular Router (since our routing will be handled by the ASP.NET).
The CLI installs the necessary Angular packages and dependencies in a folder called AngularApp. You can serve this application on to the browser by running the following commands:
$ cd angular-app
$ ng serve --open
Our project setup is now complete and we can start coding.
Creating the Component
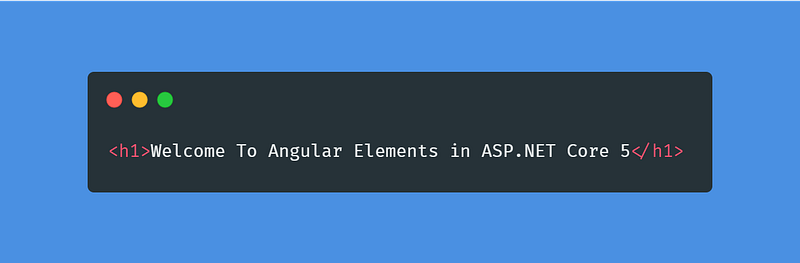
As you can see, the app contains already contains a few things that we can display on the screen. But we don’t need them. So go back to your code editor and delete everything inside src/app/app.component.html file and write a single <h1> element.
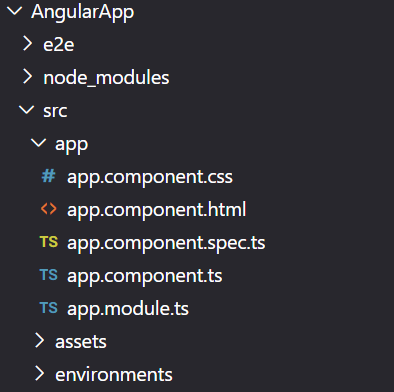
If you take a look at the file structure, you will see that each component in angular consists of a multitude of files. For the App component alone, there is a .ts, .html, .css, and a spec.ts file that contains the tests, and a module.ts file. There will also be an optional routing.module.ts file if you had chosen to add the routing feature to the application while creating it using the CLI.
Instead of writing all these files for our components, Angular CLI gives us a shorthand method that will generate these files for us. Let’s use this method to create a MyAngularElements component in our system.
$ ng generate component MyAngularElementsThis single command will create a folder named my-angular-elements inside the src/app folder. If you open this file, you will find these 4 files inside it:
my-angular-elements.component.cssmy-angular-elements.component.htmlmy-angular-elements.component.spec.tsmy-angular-elements.component.ts
We will only be using the .html and .ts files. There are additional flags that we can pass to the ng generate component command to avoid creating the other files. But in order to keep things simple and to point, I won’t use them. Check Angular Docs to know more about how to use this command.
We will create a component that displays the current time and updates every second. Change the contents of my-angular-elements.component.ts to following code:

The code is pretty straightforward if you are familiar with Angular component’s lifecycle and JavaScript’s built-in clearInterval function. If not, you can learn more in the documentation pages here and here.
Next, change the contents of my-angular-elements.component.html to display the value returned by getTime() method.

That’s it! Finally to use the component we just need to add it to the app.component.html:
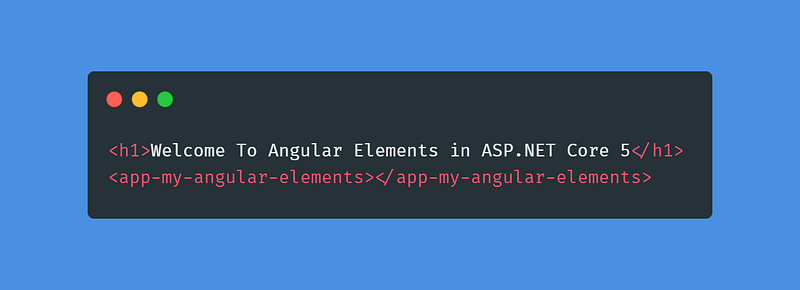
Then the contents of my-angular-elements.component.html will be displayed in the browser.
Convert Component Into Custom Element
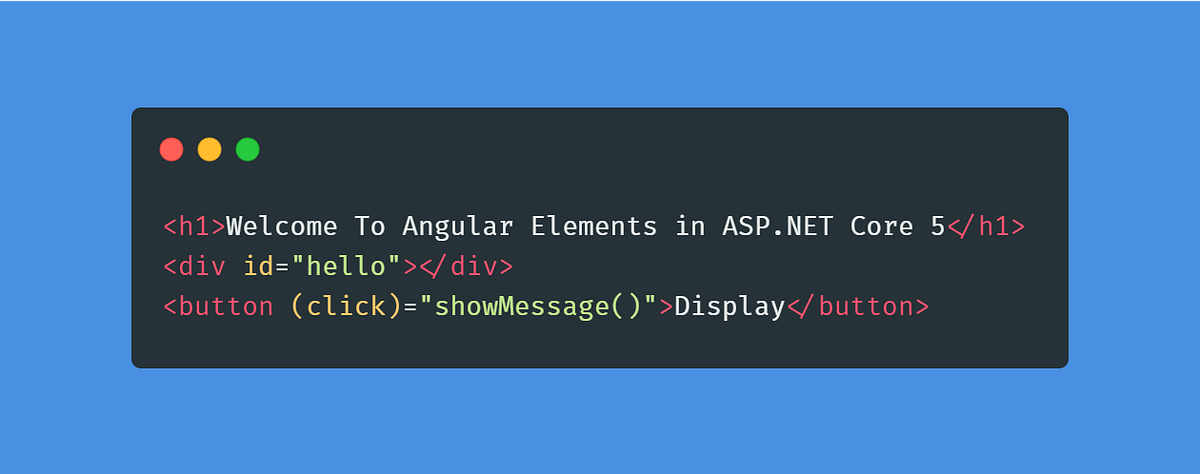
Right now, we have a simple MyAngularElements component that simply prints some text on the screen. Let’s take a look at how we can insert this component into the app in a more dynamic fashion. To do this, let’s replace the app-my-angular-elements with a div and a button. Let’s also add the click listener to the button, so that when someone clicks the button, the MyAngularElements component can be displayed. This will be handled by a showMessage() function. So go to the app.component.html page and make these changes:
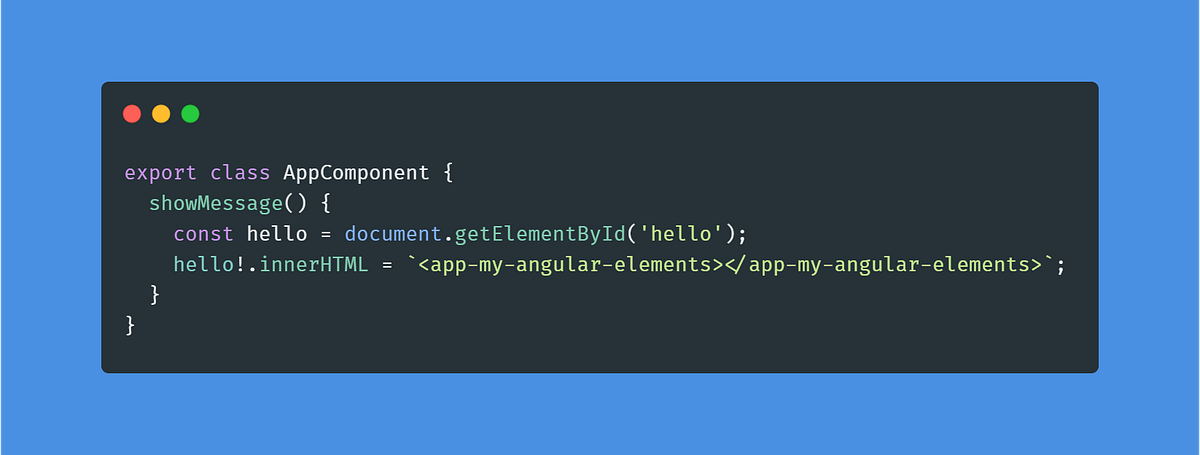
We then need to define the showMessage() function in the app.component.ts file. Here we will use regular DOM manipulation to get the div by selecting it using its id of hello. Then, we will apply the innerHTML function to insert the app-my-angular-elements component like this:
You can go to your browser and click on the button, but I will tell you right now that nothing is going to happen. But then again, if you go the browser’s dev tools and look there, you will see that the MyAngularElements component is inserted.

The reason why we can’t see the component on the screen is that Angular cannot recognize the app-my-angular-elements tag since it has been inserted into the template dynamically. Angular needs all the elements to be present in the template, or you need to use the dynamic component factory to instantiate the component at runtime through your code.
This is where Angular Elements comes into play. By using Angular Element, all we need to do is insert the tag dynamically, and Angular itself will instantiate the component for us. Let’s finally get to see how to use this component in our app. First, use the ng add command to install Angular Elements into our app:
$ ng add @angular/elements
Once you have that installed, go to app.module.ts and make the following changes:
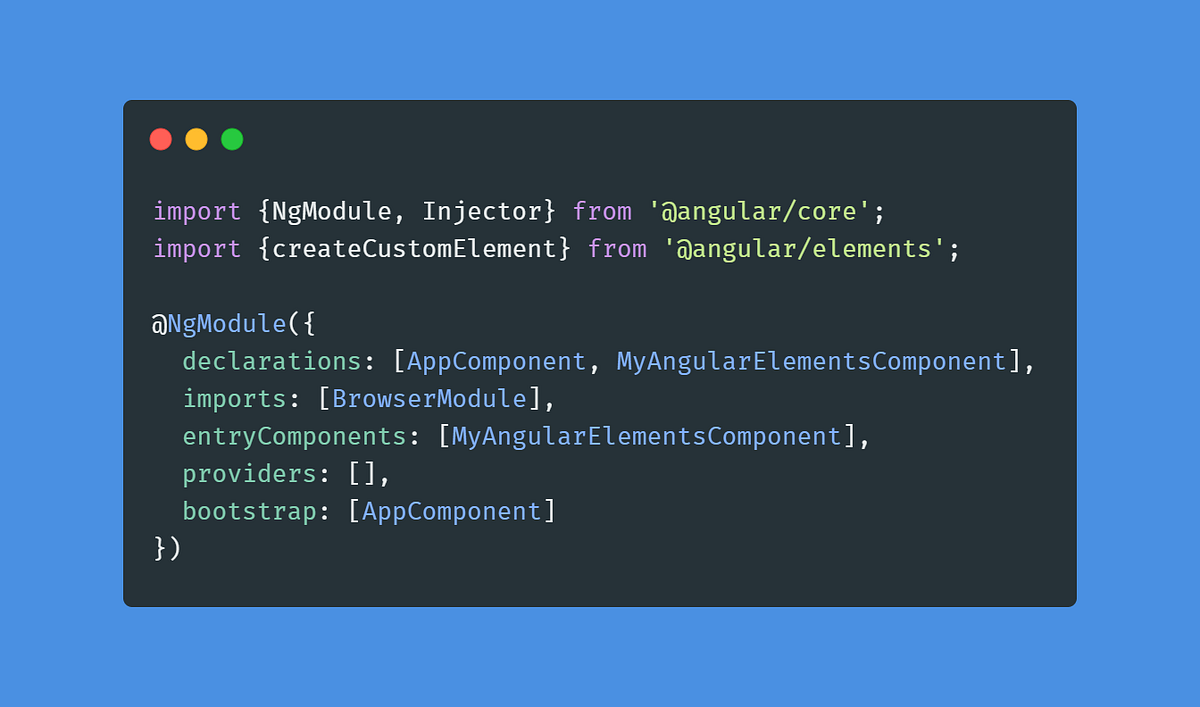
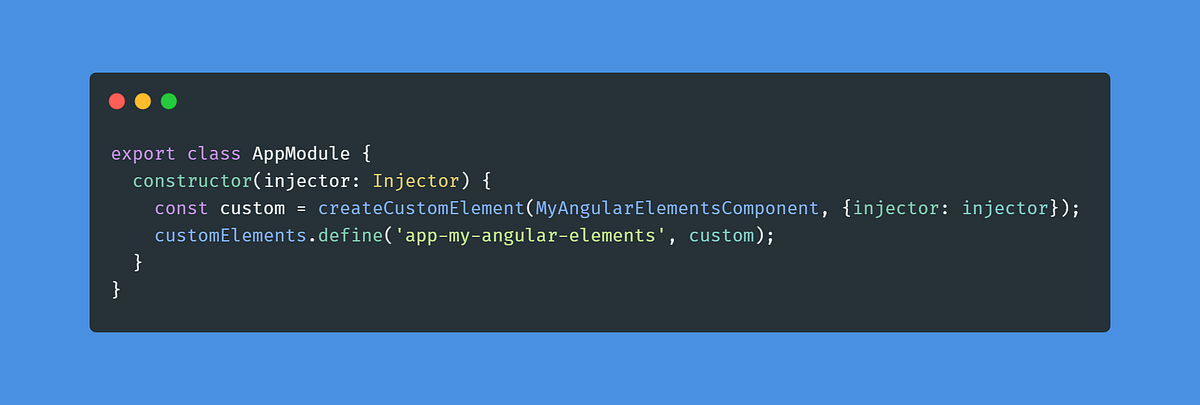
Then in the AppModule class, write a constructor function that creates a new instance of the createCustomElement and pass in MyAngularElementsComponent as shown below:

Along with the component, we also have to pass it the injector. The injector is something that we use to resolve the dependencies. With that, we have created an instance of the MyAngularElementsComponent as a custom element. We can then use the customElements API to define the component’s tag as app-my-angular-elements. The final code should be:
Go back to the my-angular-elements.component.ts file and remove the selector inside the @Component section. This way, Angular will not get confused and will know to use the custom element that we just created.
Rerun the ng serve --open command to make sure that Angular takes in all the changes that we have just made.
Compiling as a Standalone Element
The great benefit of creating custom elements is that they can be compiled into standalone script files that can then be added to different frameworks. This truly makes Angular Elements a powerful toolkit. Lets take a look at how we convert our custom element into a standalone script file which we will load into our ASP.NET Core project.
Go to app.module.ts and remove the AppComponent from the declarations field from @NgModule. Also remove the boostrap field completely and add a ngDoBootstrap function inside the AppModule class to tell Angular to handle the bootstrapping for us.

Since we don’t need the AppComponent anymore, we can delete all the files related to it. So, go ahead and remove the app.component.css, app.component.html, app.component.spec.ts and app.component.ts files. Be careful, and do not delete the app.module.ts file, and also remove the app.routing.module.ts file which you get if you have opted to add the routing to your app.
This is how your app’s folder structure should look:

We can now set up the build process for our MyAngularElementsComponent. All we need to do is run:
$ ng build AngularApp --prod --output-hashing=none --watch
You will now see a dist folder created in your project directory, and it contains a couple of files inside it.
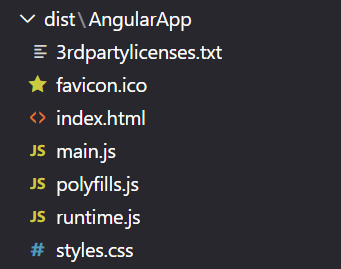
The three .js files, runtime.js, polyfills.js and main.js contain all the code needed to describe our component in pure JavaScript and must be included in HTML in the same order. We could manually copy & paste them into wwwroot folder, but since this would be tedious and since we have to deal with multiple output files and calling order is important, it is a good idea to concatenate them into a single script which we can then import into our ASP.NET Core project.
We could use any tool we prefer, like gulp or grunt, but we will take advantage of ASP.NET Core’s built-in bundling and minifying mechanism to greatly simplify things. This is also the reason behind creating the Angular project inside ASP.NET Core project. To enable bundling/minifying just add the BuildBundlerMinifier NuGet package:
$ dotnet add package BuildBundlerMinifier
and then create a new JSON file at the project’s root folder named bundleconfig.json and add the following contents:

As you may have guessed, the bundleconfig.json file defines the options for each bundle. In the preceding example, a single bundle configuration is defined for concatenating and minifying Angular’s output files and sending the results to wwwroot folder.
We can finally use our custom Angular Elements component into ASP.NET Core. Just go to Index.cshtml and change its contents to the following:

Now, run
$ dotnet run
and voilà!
Epilogue
Congrats! You have now reached the end of this post. You can now use Angular Elements to:
- Turn a regular Angular Component into a custom element
- Compile that custom element so that it can be used in a standalone capacity
- Insert the Angular Component into other frameworks like ASP.NET Core or even JavaScript libraries such as React and Vue